Show me NoPE in 5 Minutes!
1. Create a Nodejs Project
Get started by creating a new project distributed using NoPE.
Installation using npm:
npm install -g nope-js-nodeStart your first Project:
nope-js project createThis should open a
clilike that: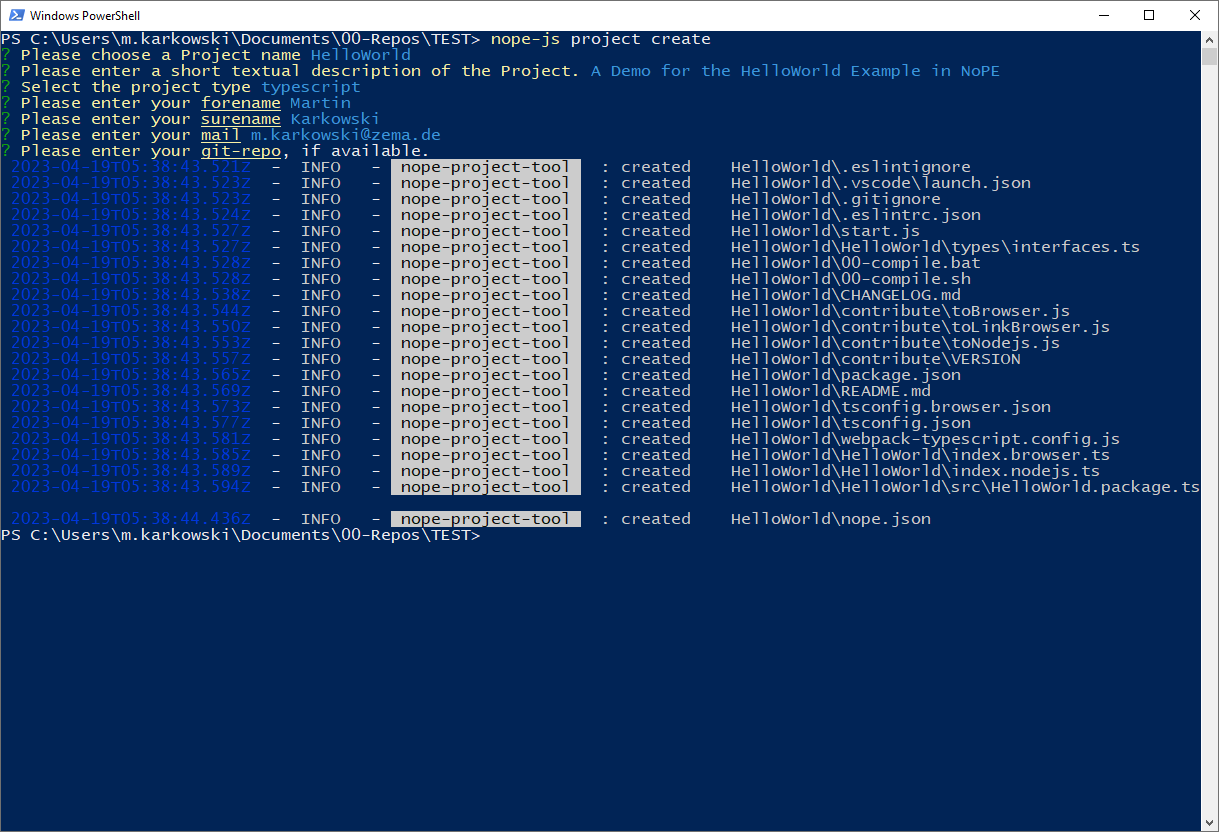
Answer the requried questions to complete create the directory.
- Name the project
HelloWorld - Give it a short summary. This summary will used during distributing your project.
- make shure you select
typescriptas project type
navigate to the create folder ( e.g.
cd ./HelloWorld)This creates the following folder structure:
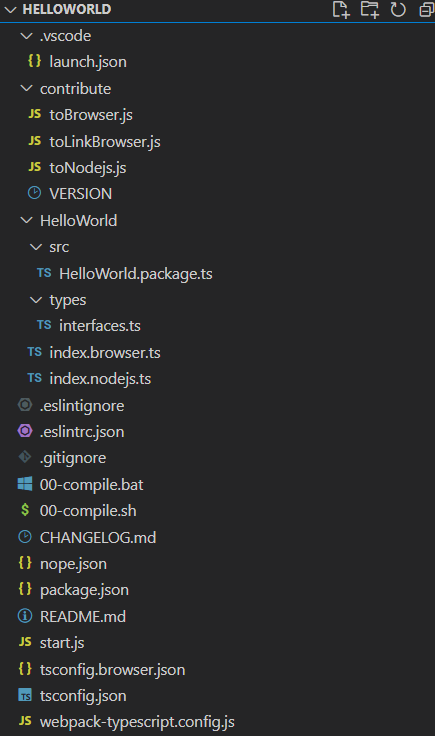
Open your IDE (e.g. vscode)
By using the project-tool the following features are added to the project:
- Debugging of the application using VS code (launch-file)
- Creation of a doc file (see doc/make)
- Helpers to build a browser related version
- Defined Project Structure (using interfaces etc.)
- Use of a changelog
- Deployment as a package
- Simple extension using project-tool
2. Add a Service in Typescript
Our goal is to define a greeting service
The service creates a greeting message for a person.
Why a Service
This service is independent of how many times it has been called. Our functionality is stateless, this allows us to use a service.
Using the CLI to generate the Service
To create the Service: use the
project-toolto create the servicenope-js project edit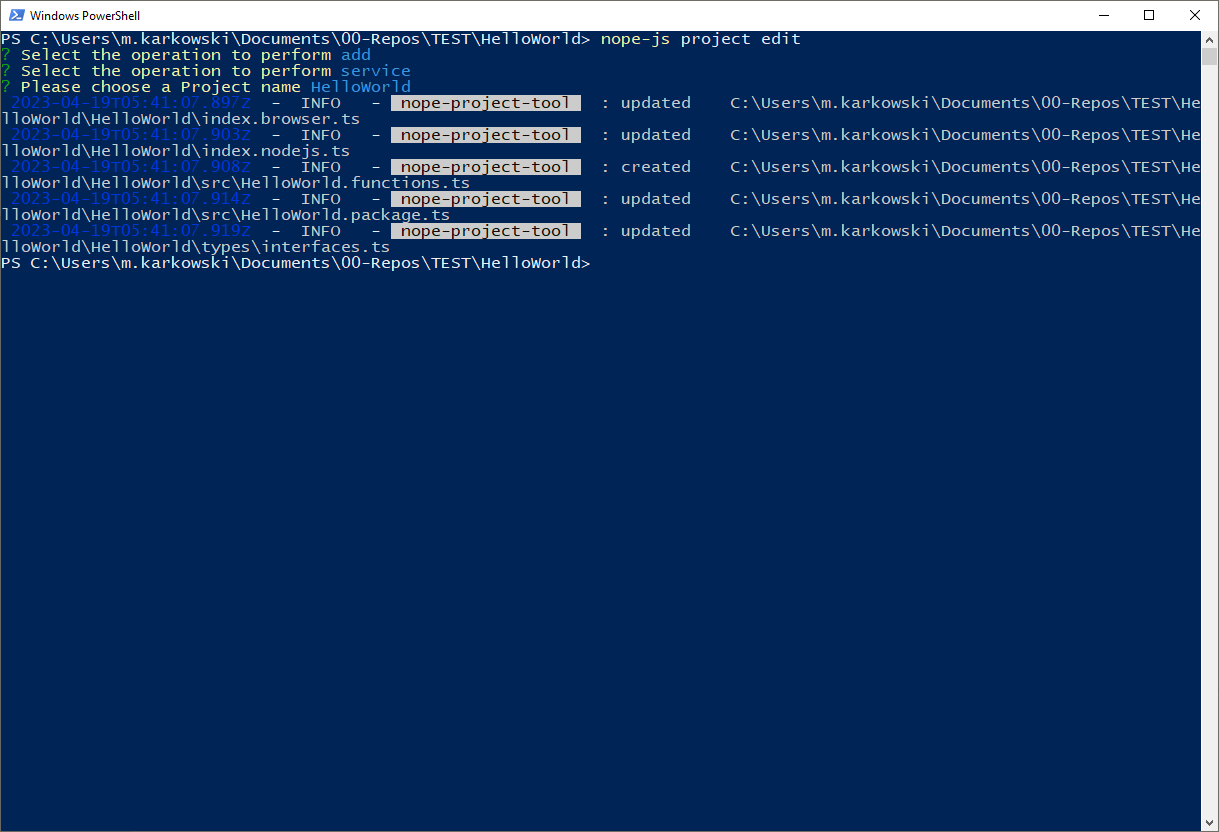
Perfom the following selection inside of the tool.
Selection
add, to add a new elementSelect
service, because we want to create a serviceEnter the name of the service, in our case
HelloWorldCreation of the corresponding files and imports is done automatically
This will update our files in the Folder:
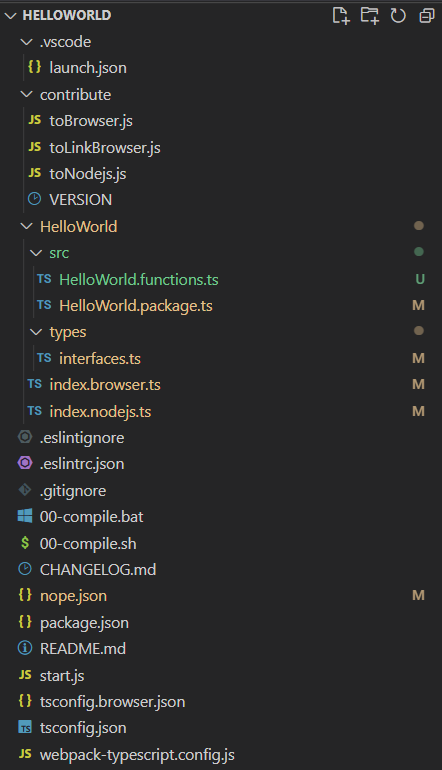
Now NoPE defined a new service file (HelloWorld.functions.ts) for us:
import { HelloWorldService } from "../types/interfaces";
import { exportAsNopeService, getNopeLogger } from "nope-js-node";

const logger = getNopeLogger("HelloWorld-service")

// Here is our main implementation we need to change
export async function _HelloWorldService (greetings: string) {
    // Please overwrite me.
    logger.debug("calling service 'HelloWorld' with the following parameters:", greetings)
    return "Hello " + greetings + "!"
}

// The exported Service.
export const HelloWorld: HelloWorldService =  exportAsNopeService(_HelloWorldService, {
    id: "HelloWorld",
    schema: {},
});
In that file, you will find a template for the service we want to implement. By default, the newly created service implements the hello-world behavior. This must changed. In our case it matches the desired behavior.
All services must be implemented
asyncmanner. This is necessary so that the runtime is not blocked.
Adding a Service interface
We now want to describe our service, that it can be used correctly at different Runtimes. Therefore we will add an schema to the exported service. This Schema follows the definition of a JSON-Schema:
export const HelloWorld: HelloWorldService =  exportAsNopeService(_HelloWorldService, {
    id: "HelloWorld",

    // We describe our interface as follows:

    schema: {

        // Enhanced Type of the JSON-Schema. We added the type: "function" for this purpose
        type: "function",

        // To describe the used inputs of a function or serive we added the field "inputs" to the schema.
        // It contains a list of all required inputs.
        inputs: [
            {
                // The Description of the Parameter
                description: "The name which should receive a Greeting",
                // Its used name in the function (see the arguments of the function)
                name: "greetings",
                // The Schema follows a default JSON-Schema
                schema: {
                    type: "string"
                }
            }
        ],

        // To describe the return of a function we added the field "outputs". It contains a
        // JSON-Schema Object.
        outputs:{
            type: "string",

            // We provide some extra Info for the other users.
            description: "The greeting Message!"
        }
    },
});
Luckily, Typescript will help us during this process due to the typing system of Typescript.
3. Running the Service:
Before we are able to execute our service we have to compile our code to pure javascript.
Make shure you installed all dependencies (This has only to be performed once):
npm installCompile your code:
./00-compile.shThis will compile the
Typescriptfiles to purejavascript. Additionally the Files will be compiled to a specific browser version.
To run the service and distribute to different NoPE-Runtimes we have to determine a configuration:
nope-js conf -d dist
The cli will find all defined services or modules exposed in a so called NoPE-Package (This has been created automatically during the initalization of the project). The tool will store its results in the following configuration (located at ./config/config.json):
{
    // Our toool fund the following functions:
    "functions": [
        {
            "path": "dist\\src\\HelloWorld.functions.js",
            "functions": []
        }
    ],

    // Additionally the tool found our `HelloWorld` Project as "module"
    "packages": [
        {
            "nameOfPackage": "HelloWorld",
            "defaultInstances": [],
            "autostart": {},
            "path": "dist\\src\\HelloWorld.package.js"
        }
    ]
}
Finally we are ready to distribute our service by using the command:
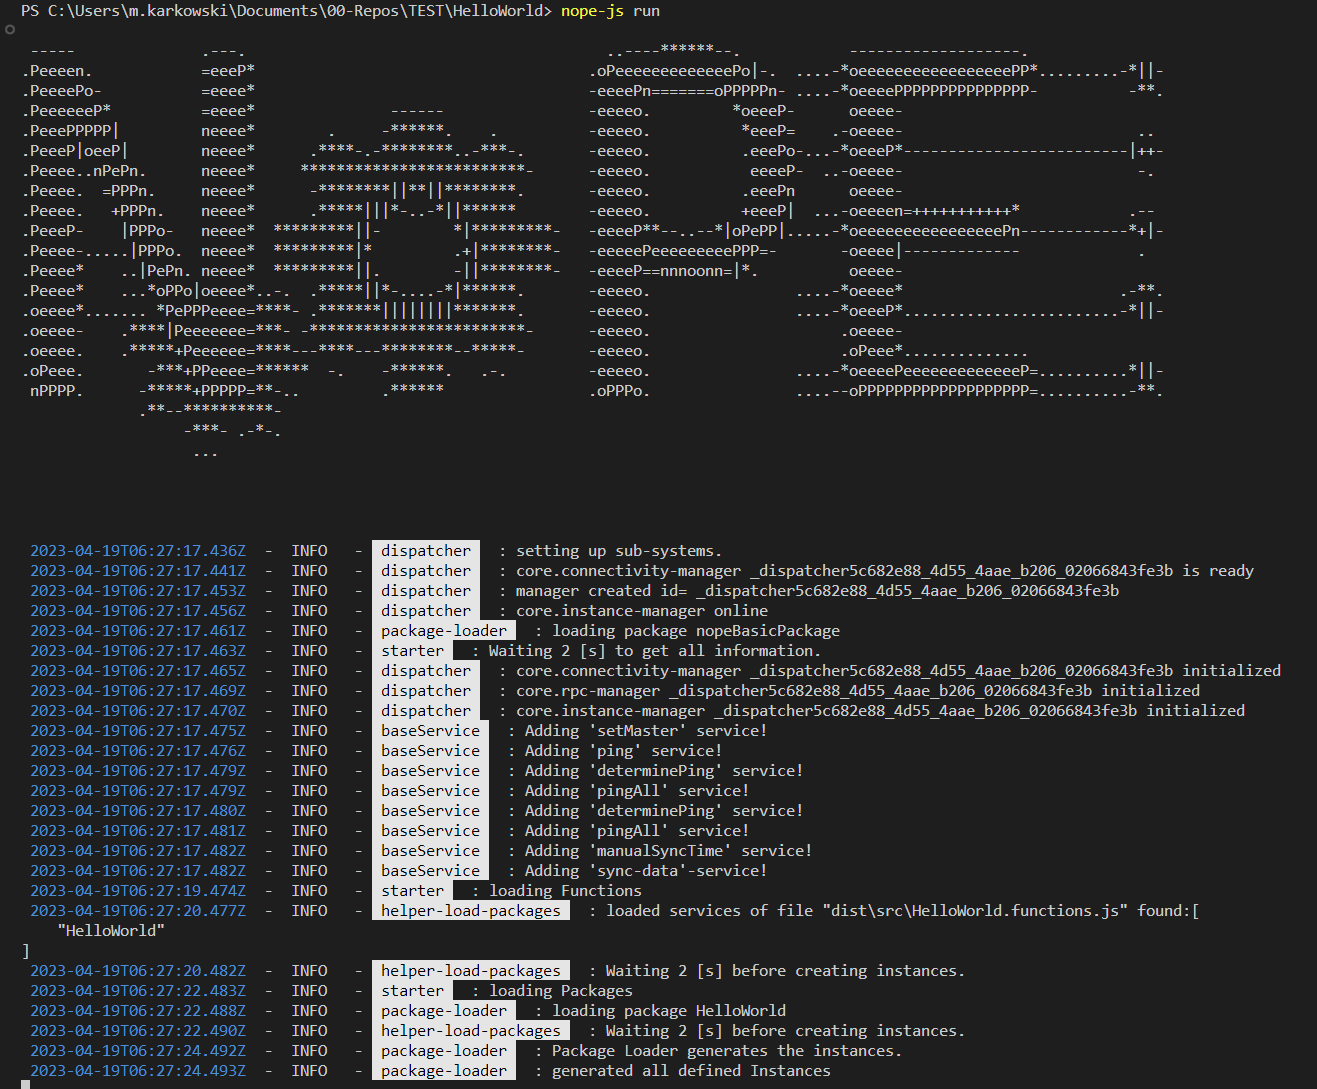
nope-js run
This should produce the following output.
4. Interact with the Runtime
Currently our service is only run internally (nope is not connected and runs without an external connection layer). To check and play with the distribution, we kill our old process (ctrl+c) create a separate process (e.g. a bash) and provide a serve:
nope-js run -c io-server
This will spool up a socket-io server on our localhost.
Afterwards we will restart our Runtime hosting the created service using io-sockets as connection layer:
nope-js run -c io-client
Now we are able to start our interact-tool to manually execute our process:
nope-js interact -c io-client -s
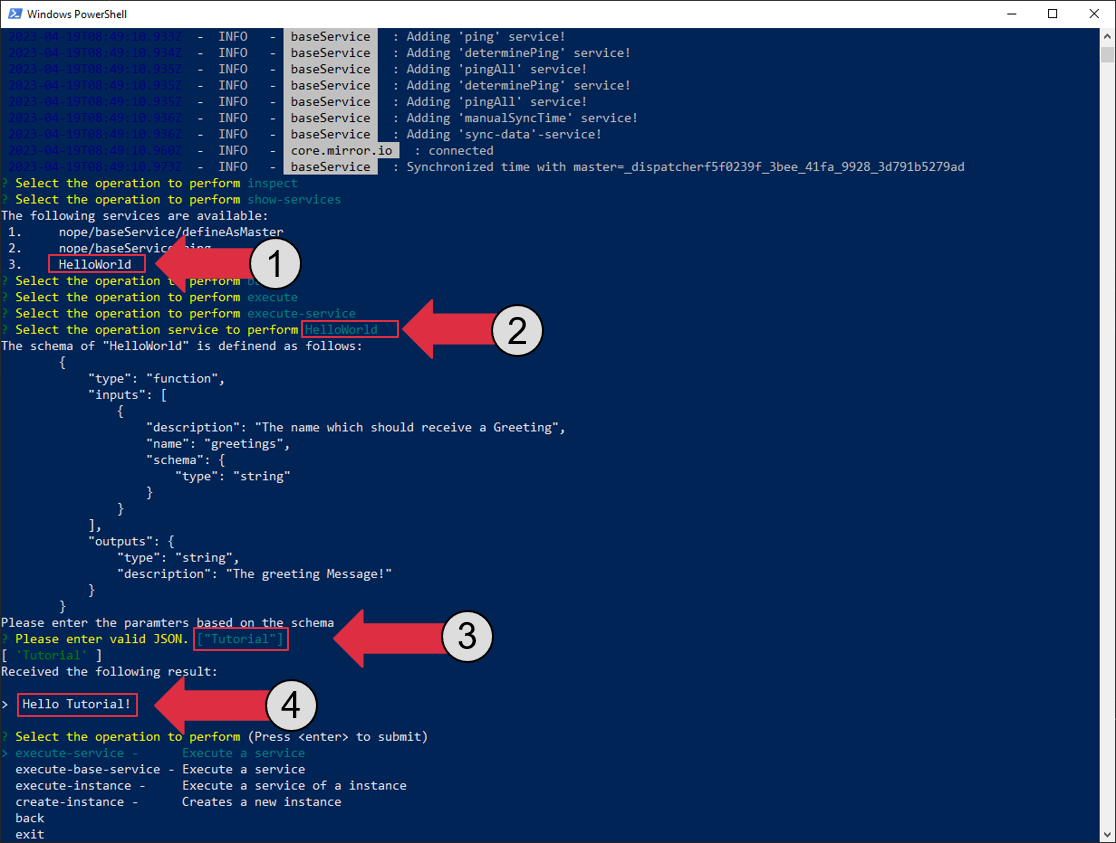
To use the interact-tool follow the questions:
What do you want to do?
- We want to inspect our distributed system ->
inspect
- We want to inspect our distributed system ->
What do you want to inspect?
- We want to check if our service is present ->
service - We should be albe to see our
HelloWorld-Service (see 1)
- We want to check if our service is present ->
Now we want to execute this service. Therefore we navigate
backto the main menuNow we select
executeand afterwardsservicebecause we want to execute our serviceNow the Tool renders the available services and we select
HelloWorld(see 2) and it will render the previously defined Schema.Now we have to enter the inputs required by the Service:
- It is important that the parameters are entered as list (because there might be more the 1 Parameter)
- Enter the parameters as valid
JSONData. - Press
enter
Take careExecuting services with the interact tool will perfom function immedialty. If you integrated Hardware be aware of that.
The Tool shows the result (see 4)
You are now running a distributed System using remote procedure calls